What steps are involved in the freezing process?
Blanching — dipping in boiling water and then in ice water — is the key to successful vegetable freezing. All vegetables (except tomatoes and peppers) should be blanched to slow or stop the enzyme action that can cause loss of flavor, color, and texture. Blanching time is very important and varies by vegetable variety and size. Under-blanching increases enzyme activity and is actually worse than not blanching at all! Over-blanching causes loss of flavor, color, vitamins, and minerals. Follow the directions or watch the video below to get started.
- Place water in a large kettle and bring it to a rolling boil. Use on gallon of water per pound of vegetables, or approximately 2 cups of prepared vegetables.
- Clean and cut vegetables as needed.
- Place vegetables in a wire basket or a perforated blancher insert and immerse in boiling water. The water should return to a boil within one minute. If it takes longer, vegetables will be soggy.
- Cover and start counting blanching time as soon as the water returns to a boil.
- Keep on high heat for the time given in the timing chart.
- Cool immediately in ice water for the same time used in blanching. Stir vegetables several times during cooling.
- Drain vegetables thoroughly.
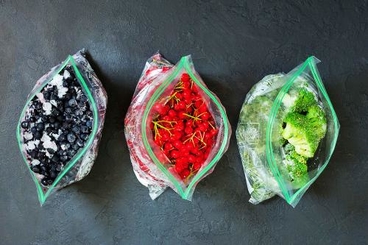
- Pack the vegetables either by dry pack or tray pack. Dry pack: Pack vegetables tightly into containers or freezer bags. Press out air and seal tightly. Tray pack: Put a single layer of the vegetables on a shallow pan and put the pan into the freezer. As soon as the vegetables are frozen, put them into a freezer bag or container. Press out air and seal tightly.
- Freeze. Frozen vegetables will maintain high quality for 12 to 18 months at 0° F or lower.
How long does the blanching process take?
| Vegetable | Time (minutes) |
| Asparagus | 3 |
| Beans (snap, green, or wax) | 3 |
| Beans (lima, butter, or pinto) | 3 |
| Broccoli | 4 |
| Brussels sprouts | 4 |
| Carrots (small or whole) | 5 |
| Carrots (sliced, diced, or strips) | 2 |
| Cauliflower | 3 |
| Celery | 3 |
| Corn on the cob | 9 |
| Eggplant | 4 |
| Greens – collards | 5 |
| Greens – all others | 2 |
| Green peas | 1.5 -2.5 |
| Okra | 3 |
| Onions | 3-7 |
| Peppers (strips or rings) | 3 |
| Potatoes | 3-5 |
| Rutabagas | 3 |
| Summer squash | 3 |
| Turnips | 3 |
What containers should I use?

Freezer containers should keep moisture in the product and keep air out.
- Look for easy-to-seal, durable, and easy-to-mark containers that are reasonably priced.
- Use containers ½ gallon or smaller. Larger containers freeze too slowly and ice crystals will form.
- Use plastic containers, flexible freezer bags, or wide-mouth glass jars (narrow-mouth jars may break at the neck). Consider square or rectangle shaped containers to save freezer space by stacking. Containers that are not specifically made for freezing shouldn’t be used as the food will develop freezer burn.